Advanced Dockerfile Directives
In this post, we are going to discuss more advanced Dockerfile directives. These directives can be used to create more advanced Docker images.
For example, we can use the VOLUME directive to bind the filesystem of the host machine to a Docker container. This will allow us to save the data generated and used by the Docker container to our local machine.
We are going to cover the following directives in this post:
- The ENV directive
- The ARG directive
- The WORKDIR directive
- The COPY directive
- The ADD directive
- The USER directive
- The VOLUME directive
- The EXPOSE directive
- The HEALTHCHECK directive
- The ONBUILD directive
The ENV Directive
The ENV directive in a Dockerfile can be used to set environment variables. Environment variables are used to set environment variables. Environment variables are key-value pairs that provide information to applications and processes running inside the container. They can influence the behavior of programs and scripts by making dynamic values available during runtime.
Environment variables are defined as key-value pairs as per the following format:
ENV <key> <value>For example, we can set a path using the ENV directive as follows:
ENV PATH $PATH:/usr/local/app/bin/We can set multiple environment variables in the same line separated by spaces. However, in this form, the key and value should be separated by the equal to (=) symbol:
ENV <key>=<value> <key=value> ...Below, we set two environment variables configured. The PATH environment variable is configured with the value of $PATH:/usr/local/app/bin, and the VERSION environment variable is configured with the value of 1.0.0:
ENV PATH=$PATH:/usr/local/app/bin/ VERSION=1.0.0Once an environment variable is set with the ENV directive in the Dockerfile, this variable is available in all subsequent Docker image layers. This variable is even available in the Docker containers launched from this Docker image.
The ARG Directive
The ARG directive in a Dockerfile is used to define variables that users can pass at build time to the builder with the docker build command. These variables behave similarly to environment variables and can be used throughout the Dockerfile but are not persisted in the final image unless explicitly declared using the ENV directive.
The ARG directive has the following format:
ARG <varname>We can also add multiple ARG directives, as follows:
ARG USER
ARG VERSION
These arguments can also have optional default values specified within the Dockerfile itself. If no value is provided by the user during the build process, Docker uses the default value defined in the ARG instruction:
ARG USER=TestUser
ARG VERSION=1.0.0
Unlike the ENV variables, ARG variables are not accessible from the running container. They are only available during the build process.
Using ENV and ARG Directives in a Dockerfile
We are going to create a Dockerfile that will use ubuntu as the parent image, but we will be able to change the ubuntu version at build time. We will also going to specify the environment's name and application directory as the environment variables of the Docker image.
Create a new directory named env-arg-example using the mkdir command:
mkdir env-arg-exampleNavigate the newly created env-arg-example directory using the cd command:
cd env-arg-exampleNow, let's create a new Dockerfile. I am going to use VS Code but feel free to use any editor you feel comfortable with:
code DockerfileAdd the following content to the Dockerfile. Then save and exit:
ARG TAG=latest
FROM ubuntu:$TAG
LABEL [email protected]
ENV ENVIRONMENT=dev APP_DIR=/usr/local/app/bin
CMD ["env"]
The Dockerfile begins by defining an argument TAG with a default value of latest. It then uses this argument to specify the base image in the FROM directive, resulting in the selection of the Ubuntu image tagged with latest.
The LABEL directive adds metadata to the image, indicating the maintainer's email address. Next, the ENV directive sets two environment variables: ENVIRONMENT with a value of dev and APP_DIR pointing to /usr/local/app/bin. These variables can be used by applications running inside the container to adjust behavior based on the environment and directory paths.
Finally, the CMD directive specifies the command to run when a container is started from this image, in this case, it executes env to display all environment variables set within the container.
Now lets build the Docker image:
docker image build -t env-arg --build-arg TAG=23.10 .The output should look similar to the following:
[+] Building 34.9s (6/6) FINISHED                                                                                                            docker:default
 => [internal] load .dockerignore                                                                                                                      0.0s
 => => transferring context: 2B                                                                                                                        0.0s
 => [internal] load build definition from Dockerfile                                                                                                   0.0s
 => => transferring dockerfile: 189B                                                                                                                   0.0s
 => [internal] load metadata for docker.io/library/ubuntu:23.10                                                                                        3.3s
 => [auth] library/ubuntu:pull token for registry-1.docker.io                                                                                          0.0s
 => [1/1] FROM docker.io/library/ubuntu:23.10@sha256:fd7fe639db24c4e005643921beea92bc449aac4f4d40d60cd9ad9ab6456aec01                                 31.6s
 => => resolve docker.io/library/ubuntu:23.10@sha256:fd7fe639db24c4e005643921beea92bc449aac4f4d40d60cd9ad9ab6456aec01                                  0.0s
 => => sha256:fd7fe639db24c4e005643921beea92bc449aac4f4d40d60cd9ad9ab6456aec01 1.13kB / 1.13kB                                                         0.0s
 => => sha256:c57e8a329cd805f341ed7ee7fcc010761b29b9b8771b02a4f74fc794f1d7eac5 424B / 424B                                                             0.0s
 => => sha256:77081d4f1e7217ffd2b55df73979d33fd493ad941b3c1f67f1e2364b9ee7672f 2.30kB / 2.30kB                                                         0.0s
 => => sha256:cd0bff360addc3363f9442a3e0b72ff44a74ccc0120d0fc49dfe793035242642 27.23MB / 27.23MB                                                      30.3s
 => => extracting sha256:cd0bff360addc3363f9442a3e0b72ff44a74ccc0120d0fc49dfe793035242642                                                              1.1s
 => exporting to image                                                                                                                                 0.0s
 => => exporting layers                                                                                                                                0.0s
 => => writing image sha256:86b2f4c440c71f37c3f29f5dd5fe79beac30f5a6ce878bd14dc17f439bd2377d                                                           0.0s
 => => naming to docker.io/library/env-arg                                                                                                             0.0s
Now, execute the docker container run command to start a new container from the Docker image that we built in the last step:
docker container run env-argAnd the output should be something similar to the following:
PATH=/usr/local/sbin:/usr/local/bin:/usr/sbin:/usr/bin:/sbin:/bin
HOSTNAME=d6020a144f39
ENVIRONMENT=dev
APP_DIR=/usr/local/app/bin
HOME=/root
The WORKDIR Directive
The WORKDIR directive in a Dockerfile is used to set the current working directory for any subsequent instructions that follow in the Dockerfile. This directive helps to define where the commands such as ADD, CMD, COPY, ENTRYPOINT, and RUN, will be executed within the container.
The WORKDIR directive has the following format:
WORKDIR /path/to/workdirIf the specified directory does not exist in the image, Docker will create it during the build process. Also the WORKDIR directive effectively combines the functionality of mkdir and cd commands in a Unix-like system. It creates the directory if it doesn't exist and changes the current directory to the specified path.
We can have multiple WORKDIR directives in a Dockerfile. If subsequent WORKDIR directives use relative paths, they will be relative to the last WORKDIR set.
So for example:
WORKDIR /one
WORKDIR two
WORKDIR three
WORKDIR drink
WORKDIR /one will set /one as the initial working directory. WORKINGDIR two will then change the directory to /one/two. WORKDIR three further changes it to one/two/three. Finally WORKDIR drink will change it to its final form one/two/three/drink.
The COPY Directive
When building a Docker image, it's common to include files from our local development environment into the image itself. These files can range from application source code to configuration files and other resources needed for the application to run properly inside the container. The COPY directive in a Dockerfile serves this purpose by allowing us to specify which files or directories from our local filesystem should be copied into the image being built.
The syntax of the COPY command looks as follows:
COPY <source> <destination>The <source> specifies the path to the file or directory on your local filesystem relative to the build context. The <destination> specifies the path where the file or directory should be copied within the Docker image filesystem.
In the following example, we are using the COPY directive to copy an index.html file from the local filesystem to the /var/www/html/ directory of the Docker image:
COPY index.html /var/www/html/index.htmlWe can also use wildcards to copy all files matching the given pattern. Below, we will copy all files with the .html extension from the current directory to the /var/www/html/ directory of the Docker image:
COPY *.html /var/www/html/When using the COPY directive in a Dockerfile to transfer files from the local filesystem into a Docker image, we can also specify the --chown flag. This flag allows us to set the user and group ownership of the copied files within the Docker image.
COPY --chown=myuser:mygroup *.html /var/www/html/In this example, --chown=myuser:mygroup specifies that all .html files being copied from the local directory to /var/www/html/ in the Docker image, should be owned by myuser (the user) and mygroup (the group).
The ADD Directive
The ADD directive in Dockerfiles functions similar to the COPY directive but with additional features.
ADD <source> <destination>The <source> specifies a path or URL to the file or directory on the local filesystem or a remote URL. The <destination> again specifies the path where the file or directory should be copied within the Docker image filesystem.
In the example below, we are going to use ADD to copy a file from the local filesystem:
ADD index.html /var/www/html/index.htmlIn this example, Docker is going to copy the index.html file from the local filesystem (relative to the Docker build context) into /var/www/html/index.html within the Docker image.
In the example below, we are going to use ADD to copy a file from a remote URL:
ADD http://example.com/test-data.csv /tmp/test-data.csvUnlike COPY, the ADD directive allows specifying a URL (in this case http://example.com/test-data.csv) as the <source> parameter. Docker will download the file from the URL and copy it to the /tmp/test-data.csv within the Docker image.
The ADD directive not only copies files from the local filesystem or downloads them from URLs but also includes automatic extraction capabilities from a certain types of compressed archives. When.tar, .tar.gz, .tgz, .bz2, .tbz2, .txz, .zip), Docker will automatically extract its contents into <destination> within the Docker image filesystem.
For example:
ADD myapp.tar.gz /opt/myapp/In the example above, myapp.tar.gz is a compressed archive file, and Docker will automatically extract the contents of myapp.tar.gz into /opt/myapp/ within the Docker image.
Best Practices: COPY vs ADD in Dockerfiles
When writing Dockerfiles, choosing between the COPY and ADD directives is crucial for maintaining clarity, security and reliability in the image build process.
Clarity and Intent
COPY is straightforward and explicitly states that files or directories from the local filesystem are being copied into the Docker image. This clarity helps with understanding the Dockerfile's purpose and makes it easier to maintain over time.
On the other hand, ADD introduces additional functionalities such as downloading files from URLs and automatically extracting compressed archives. While these features can be convenient in certain scenarios , they can also obscure the original intent of simply copying files. This lack of transparency might lead to unexpected behaviors or security risks if not carefully managed.
Security and Predictability
Using COPY enhances security by avoiding potential risks associated with downloading files from arbitrary URLs. Docker images should be built using controlled, validated sources to prevent unintended or malicious content from being included. Separating the download of files from the build process and using COPY ensures that the Docker build environment remains secure and predictable.
Docker Philosophy Alignment
Docker encourages building lightweight, efficient, and predictable containerized applications. COPY aligns well with this philosophy by promoting simplicity and reducing the risk of unintended side effects during image builds.
Using the WORKDIR, COPY, and ADD Directives in a Dockerfile
In this example we are going to deploy a custom HTML file to an Apache web server. We are going to use Ubuntu as our base image and install Apache on top of it. Then, we are going to copy the custom index.html file to the Docker image and download a Docker logo.
Create a new directory named workdir-copy-add-example using the mkdir command:
mkdir workdir-copy-add-exampleNavigate to the newly created workdir-copy-add-example directory:
cd .\workdir-copy-add-example\Within the workdir-copy-add-example directory, create a file named index.html. This file will be copied to the Docker image during build time. I am going to use VS Code, but feel free to use any editor you feel more comfortable with:
code index.htmlAdd the following content to the index.html file, save it, and close your editor:
<html>
    <body>
        <h1>
            Welcome to Docker!
        </h1>
        <img src="logo.png" height="350" width="500"/>
    </body>
</html>
This HTML code creates a basic web page that greets visitors with a large heading saying "Welcome to Docker!". Below the heading, it includes an image displayed using the <img> tag with the source attribute (src="logo.png"), indicating that it should fetch and display an image file named logo.png. The image is sized to be 350 pixels in height and 500 pixels in width (height="350" and width="500").
Now, create a Dockerfile within this directory:
code DockerfileAdd the following content to the Dockerfile file, save it, and exit:
FROM ubuntu:latest
RUN apt-get update && apt-get upgrade
RUN apt-get install apache2 -y
WORKDIR /var/www/html/
COPY index.html .
ADD https://upload.wikimedia.org/wikipedia/commons/4/4e/Docker_%28container_engine%29_logo.svg ./logo.png
CMD ["ls"]
This Dockerfile begins by specifying FROM ubuntu:latest, indicating it will build upon the latest Ubuntu base image available. The subsequent RUN apt-get update && apt-get upgrade commands update and upgrade the package lists within the container. Following this, apt-get install apache2 -y installs the Apache web server using the package manager. The WORKDIR /var/www/html/ directive sets the working directory to /var/www/html/, a common location for serving web content in Apache.
Within this directory, COPY index.html . copies a local index.html file from the host machine into the container. Additionally, ADD https://upload.wikimedia.org/wikipedia/commons/4/4e/Docker_%28container_engine%29_logo.svg ./logo.png retrieves an SVG image file from a URL and saves it locally as logo.png in the same directory.
Lastly, CMD ["ls"] specifies that upon container startup, the ls command will execute, displaying a listing of files and directories in /var/www/html/.
Now, build the Docker image with the tag of workdir-copy-add:
docker build -t workdir-copy-add .You should see the following output:
[+] Building 4.0s (13/13) FINISHED                                                                       docker:default
 => [internal] load build definition from Dockerfile                                                               0.0s
 => => transferring dockerfile: 290B                                                                               0.0s
 => [internal] load .dockerignore                                                                                  0.0s
 => => transferring context: 2B                                                                                    0.0s
 => [internal] load metadata for docker.io/library/ubuntu:latest                                                   3.6s
 => [auth] library/ubuntu:pull token for registry-1.docker.io                                                      0.0s
 => [1/6] FROM docker.io/library/ubuntu:latest@sha256:2e863c44b718727c860746568e1d54afd13b2fa71b160f5cd9058fc4362  0.0s
 => => resolve docker.io/library/ubuntu:latest@sha256:2e863c44b718727c860746568e1d54afd13b2fa71b160f5cd9058fc4362  0.0s
 => [internal] load build context                                                                                  0.0s
 => => transferring context: 32B                                                                                   0.0s
 => https://upload.wikimedia.org/wikipedia/commons/4/4e/Docker_%28container_engine%29_logo.svg                     0.3s
 => CACHED [2/6] RUN apt-get update && apt-get upgrade                                                             0.0s
 => CACHED [3/6] RUN apt-get install apache2 -y                                                                    0.0s
 => CACHED [4/6] WORKDIR /var/www/html/                                                                            0.0s
 => CACHED [5/6] COPY index.html .                                                                                 0.0s
 => CACHED [6/6] ADD https://upload.wikimedia.org/wikipedia/commons/4/4e/Docker_%28container_engine%29_logo.svg .  0.0s
 => exporting to image                                                                                             0.0s
 => => exporting layers                                                                                            0.0s
 => => writing image sha256:646864d79dc576f862a980ef6ddab550ef9801790d2c91967c3c9596cf85b81a                       0.0s
 => => naming to docker.io/library/workdir-copy-add                                                                0.0s
Execute the docker container run command to start a new container from the Docker image we built previously:
docker run workdir-copy-addAs we can see, both index.html and logo.png are available in the /var/www/html/ directory:
index.html
logo.png
The USER Directive
In Docker, by default, containers run with the root user, which has extensive privileges within the container environment. To mitigate security risks, Docker allows us to specify a non-root user using the USER directive in the Dockerfile. This directive sets the default user for the container, and all subsequent commands specified in the Dockerfile, such as RUN, CMD, and ENTRYPOINT, will be executed under this user's context.
Implementing the USER directive is considered a best practice in Docker security, aligning with the principle of least privilege. It ensures that containers operate with minimal privileges necessary for their functionality, thereby enhancing overall system security and reducing the attack surface.
The USER directive takes the following format:
USER <user>In addition to the username, we can also specify the optional group name to run the Docker container:
USER <user>:<group>You need to make sure that the <user> and <group> values are valid user and group names. Otherwise, the Docker daemon will throw an error while trying to run the container.
Using USER Directive in the Dockerfile
In this example we are going to use the USER directive in the Dockerfile to set the default user. We will be installing the Apache web server and changing the user to www-data. Finally, we will execute the whoami command to verify the current user by printing the username.
Create a new directory named user-example
mkdir user-exampleNavigate to the newly created user-example directory
cd .\user-example\Within the user-example directory create a new Dockerfile
code DockerfileAdd the following content to your Dockerfile, save it and close the editor:
FROM ubuntu:latest
RUN apt-get update && apt-get upgrade
RUN apt-get install apache2 -y
USER www-data
CMD ["whoami"]
This Dockerfile starts with the latest Ubuntu base image and updates system packages before installing Apache web server (apache2). It enhances security by switching to the www-data user, commonly used for web servers, to minimize potential vulnerabilities. The CMD ["whoami"] directive ensures that when the container starts, it displays the current user (www-data), demonstrating a secure setup suitable for hosting web applications in a Docker environment.
Build the Docker image:
docker build -t user .And you should see the following output:
[+] Building 5.0s (8/8) FINISHED                                                                                                             docker:default
 => [internal] load build definition from Dockerfile                                                                                                   0.0s
 => => transferring dockerfile: 157B                                                                                                                   0.0s
 => [internal] load .dockerignore                                                                                                                      0.1s
 => => transferring context: 2B                                                                                                                        0.0s
 => [internal] load metadata for docker.io/library/ubuntu:latest                                                                                       4.8s
 => [auth] library/ubuntu:pull token for registry-1.docker.io                                                                                          0.0s
 => [1/3] FROM docker.io/library/ubuntu:latest@sha256:2e863c44b718727c860746568e1d54afd13b2fa71b160f5cd9058fc436217b30                                 0.0s
 => => resolve docker.io/library/ubuntu:latest@sha256:2e863c44b718727c860746568e1d54afd13b2fa71b160f5cd9058fc436217b30                                 0.0s
 => CACHED [2/3] RUN apt-get update && apt-get upgrade                                                                                                 0.0s
 => CACHED [3/3] RUN apt-get install apache2 -y                                                                                                        0.0s
 => exporting to image                                                                                                                                 0.0s
 => => exporting layers                                                                                                                                0.0s
 => => writing image sha256:ce1de597471f741f4fcae898215cfcb0d847aacf7c201690c5d4e95289476768                                                           0.0s
 => => naming to docker.io/library/user                                                                                                                0.0s
Now, execute the docker container run command to start a new container from the Docker image that we built in the previous step:
docker container run userAnd the output should display www-data as the current user associated with the Docker container:
www-dataThe VOLUME Directive
In Docker, containers are designed to encapsulate applications and their dependencies in a portable and lightweight manner. However, by default, any data generated or modified within a Docker container's filesystem is ephemeral, meaning it exists only for the duration of the container's runtime. When a container is deleted or replaced, this data is lost, which poses challenges for applications that require persistent storage, such as databases or file storage systems.
To address this challenge, Docker introduced the concept of volumes. Volumes provide a way to persist data independently of the container lifecycle. They act as a bridge between the Docker container and the host machine, ensuring that data stored within volumes persists even when containers are stopped, removed, or replaced. This makes volumes essential for applications that need to maintain stateful information across container instances, such as storing databases, configuration files, or application logs.
When you define a volume in a Dockerfile using the VOLUME directive, Docker creates a managed directory within the container’s filesystem. This directory serves as the mount point for the volume. Crucially, Docker also establishes a corresponding directory on the host machine, where the actual data for the volume is stored. This mapping ensures that any changes made to files within the volume from within the container are immediately synchronized with the mapped directory on the host machine, and vice versa.
Volumes in Docker support various types, including named volumes and host-mounted volumes. Named volumes are created and managed by Docker, offering more control and flexibility over volume lifecycle and storage management. Host-mounted volumes, on the other hand, allow you to directly mount a directory from the host filesystem into the container, providing straightforward access to host resources.
The VOLUME directive generally takes a JSON array as a parameter:
VOLUME ["path/to/volume"]Or, we can specify a plain string with multiple paths:
VOLUME /path/to/volume1 /path/to/volume2We can use the docker container inspect <container> command to view the volumes available in a container. The output JSON of the docker container inspect command will print the volume information similar to the following:
[
   {
      "CreatedAt":"2024-06-21T22:52:52+03:00",
      "Driver":"local",
      "Labels":null,
      "Mountpoint":"/var/lib/docker/volumes/f46f82ea6310d0db3a13897a0c3ab45e659ff3255eaeead680b48bca37cc0166/_data",
      "Name":"f46f82ea6310d0db3a13897a0c3ab45e659ff3255eaeead680b48bca37cc0166",
      "Options":null,
      "Scope":"local"
   }
]
Using the VOLUME Directive in the Dockerfile
In this example, we are going to setup a Docker container to run the Apache web server. However, we don't want to lose the Apache log files in case of a Docker container failure. As a solution, we are going to persist the log files by mounting the Apache log path to the underlying Docker host.
Create a new directory named volume-example
mkdir volume-exampleNavigate to the newly created volume-example directory
cd volume-exampleWithin the volume-example directory create a new Dockerfile
code DockerfileAdd the following to the Dockerfile, save it, and exit
FROM ubuntu:latest
RUN apt-get update && apt-get upgrade
RUN apt-get install apache2 -y
VOLUME ["/var/log/apache2"]
This Dockerfile starts by using the latest version of Ubuntu as the base image and ensures it is up to date by running apt-get update and apt-get upgrade to update all installed packages. It then installs Apache HTTP Server (apache2) using apt-get install apache2 -y. The VOLUME ["/var/log/apache2"] directive defines a Docker volume at /var/log/apache2, which is where Apache typically stores its log files.
Now, let's build the Docker image:
docker build -t volume .And the output should be as follows:
[+] Building 3.6s (8/8) FINISHED                                                                                                             docker:default
 => [internal] load .dockerignore                                                                                                                      0.0s
 => => transferring context: 2B                                                                                                                        0.0s
 => [internal] load build definition from Dockerfile                                                                                                   0.0s
 => => transferring dockerfile: 155B                                                                                                                   0.0s
 => [internal] load metadata for docker.io/library/ubuntu:latest                                                                                       3.5s
 => [auth] library/ubuntu:pull token for registry-1.docker.io                                                                                          0.0s
 => [1/3] FROM docker.io/library/ubuntu:latest@sha256:2e863c44b718727c860746568e1d54afd13b2fa71b160f5cd9058fc436217b30                                 0.0s
 => => resolve docker.io/library/ubuntu:latest@sha256:2e863c44b718727c860746568e1d54afd13b2fa71b160f5cd9058fc436217b30                                 0.0s
 => CACHED [2/3] RUN apt-get update && apt-get upgrade                                                                                                 0.0s
 => CACHED [3/3] RUN apt-get install apache2 -y                                                                                                        0.0s
 => exporting to image                                                                                                                                 0.0s
 => => exporting layers                                                                                                                                0.0s
 => => writing image sha256:9c7a81e379553444e0b4f3bbf45bdd17880aea251db8f8b75669e13964b9c30f                                                           0.0s
 => => naming to docker.io/library/volume
Execute the docker container run command to start a new container from the previously built image. Note that you also need to use the --interactive and --tty flags to open an interactive bash session so that you can execute commands from the bash shell of the container. Also, you need to use the --name flag to define the container name as volume-container
docker container run --interactive --tty --name volume-container volume /bin/bashYour bash shell will be opened as follows:
root@8aa0f5fb8a6d:/#Navigate to the /var/log/apache2 directory
root@8aa0f5fb8a6d:/# cd /var/log/apache2/This will produce the following output:
root@8aa0f5fb8a6d:/var/log/apache2#Now, list the available files in the directory
root@8aa0f5fb8a6d:/var/log/apache2# ls -lThe output should be as follows
total 0
-rw-r----- 1 root adm 0 Jun 20 13:42 access.log
-rw-r----- 1 root adm 0 Jun 20 13:42 error.log
-rw-r----- 1 root adm 0 Jun 20 13:42 other_vhosts_access.log
These are the log files created by Apache while running the process. The same files should be available once you check the host mount of this volume.
Exit the container to check the host filesystem
root@8aa0f5fb8a6d:/var/log/apache2# exitInspect the volume-container to view the mount information
docker container inspect volume-containerUnder the Mounts key, you will be able to see the information relating to the mount
"Mounts":[
    {
         "Type":"volume",
         "Name":"50d3a5abf34535fbd3a347cbd6c74acf87a7aa533494360e661c73bbdf34b3e8",
         "Source":"/var/lib/docker/volumes/50d3a5abf34535fbd3a347cbd6c74acf87a7aa533494360e661c73bbdf34b3e8/_data",
         "Destination":"/var/log/apache2",
         "Driver":"local",
         "Mode":"",
         "RW":true,
         "Propagation":""
    }
]
Inspect the volume with the docker volume inspect <volume_name> command. You can find the <volume_name> in the Name field of the previous output
docker volume inspect 50d3a5abf34535fbd3a347cbd6c74acf87a7aa533494360e661c73bbdf34b3e8You should get an output similar to the following
[{
   "CreatedAt":"2024-06-21T11:02:32Z",
   "Driver":"local",
   "Labels":{
      "com.docker.volume.anonymous":""
   },
   "Mountpoint":"/var/lib/docker/volumes/50d3a5abf34535fbd3a347cbd6c74acf87a7aa533494360e661c73bbdf34b3e8/_data",
   "Name":"50d3a5abf34535fbd3a347cbd6c74acf87a7aa533494360e661c73bbdf34b3e8",
   "Options":null,
   "Scope":"local"
}]
List the files available in the host file path. The host file path can be identified with the Mountpoint field of the previous output
ls -l /var/lib/docker/volumes/50d3a5abf34535fbd3a347cbd6c74acf87a7aa533494360e661c73bbdf34b3e8/_dataThe EXPOSE Directive
The EXPOSE directive in Docker serves to indicate to Docker that a container will be listening on specific ports during its runtime. This declaration is primarily informative and does not actually publish the ports to the host system or make them accessible from outside the container by default. Instead, it documents which ports are intended to be used for inter-container communication or network services within the Docker environment.
The EXPOSE directive supports both TCP and UDP protocols, allowing flexibility in how ports are exposed for various networking requirements. This directive is a precursor to the -p or -P options used during container runtime to actually map these exposed ports to ports on the host machine, enabling external access if required.
The EXPOSE directive has the following format:
EXPOSE <port>The HEALTHCHECK Directive
A health check is a crucial mechanism that designed to assess the operational health of containers. It provides a means to verify if applications running within Docker containers are functioning properly. Without a specified health check, Docker lacks the capability to autonomously determine the health status of a container. This becomes especially critical in production environments where reliability and uptime are paramount.
The HEALTHCHECK directive in Docker allows developers to define custom health checks, typically in the form of commands or scripts, that periodically inspect the container's state and report back on its health. This directive ensures proactive monitoring and helps Docker orchestration tools make informed decisions about container lifecycle management based on health status.
There can be only one HEALTHCHECK directive in a Dockerfile. If there is more than one HEALTHCHECK directive, only the last one will take effect.
For example, we can use the following directive to ensure that the container can receive traffic on the http://localhost/ endpoint:
HEALTHCHECK CMD curl -f http://localhost/ || exit 1The exit code at the end of the preceding command is used to specify the health status of a container, 0 and 1 are valid values for this field. 0 means a healthy container, 1 means an unhealthy container.
When using the HEALTHCHECK directive in Docker, it's possible to configure additional parameters beyond the basic command to tailor how health checks are performed:
- --interval: Specifies the frequency at which health checks are executed, with a default interval of 30 seconds.
- --timeout: Defines the maximum time allowed for a health check command to complete successfully. If no successful response is received within this duration, the health check is marked as failed. The default timeout is also set to 30 seconds.
- --start-period: Specifies the initial delay before Docker starts executing the first health check. This parameter allows the container some time to initialize before health checks begin, with a default start period of 0 seconds.
- --retries: Defines the number of consecutive failed health checks allowed before Docker considers the container as unhealthy. By default, Docker allows up to 3 retries.
In the following example, the default values of HEALTHCHECK are overridden, by providing custom values:
HEALTHCHECK \
    --interval=1m \
    --timeout=2s \
    --start-period=2m \
    --retries=3 \
    CMD curl -f http://localhost/ || exit 1
Using EXPOSE and HEALTHCHECK Directives in the Dockerfile
We are going to dockerize the Apache web server to access the Apache home page from the web browser. Additionally, we are going to configure health checks to determine the health status of the Apache web server.
Create a new directory named expose-heathcheck-example
mkdir expose-healthcheck-exampleNavigate to the newly created expose-healthcheck-example directory
cd .\expose-healthcheck-example\Create a Dockerfile and add the following content
FROM ubuntu:latest

RUN apt-get update && apt-get upgrade

RUN apt-get install apache2 curl -y

HEALTHCHECK CMD curl -f http://localhost/ || exit 1

EXPOSE 80

ENTRYPOINT ["apache2ctl", "-D", "FOREGROUND"]
This Dockerfile starts by pulling the latest Ubuntu base image and updating it. It then installs Apache web server and curl using apt-get. The HEALTHCHECK directive is set to run a health check command (curl -f http://localhost/ || exit 1), ensuring the container's health based on localhost connectivity. Port 80 is exposed to allow external access to Apache. Finally, the container is configured to run Apache in foreground mode using ENTRYPOINT ["apache2ctl", "-D", "FOREGROUND"], ensuring it stays active and responsive as the main process. This setup enables hosting a web server accessible via port 80 within the Docker environment.
Build the image
docker image build -t expose-healthcheck-example .You should get an output similar to the following:
[+] Building 29.0s (8/8) FINISHED                                                                                                            docker:default
 => [internal] load build definition from Dockerfile                                                                                                   0.0s
 => => transferring dockerfile: 244B                                                                                                                   0.0s
 => [internal] load .dockerignore                                                                                                                      0.0s
 => => transferring context: 2B                                                                                                                        0.0s
 => [internal] load metadata for docker.io/library/ubuntu:latest                                                                                       3.4s
 => [auth] library/ubuntu:pull token for registry-1.docker.io                                                                                          0.0s
 => [1/3] FROM docker.io/library/ubuntu:latest@sha256:2e863c44b718727c860746568e1d54afd13b2fa71b160f5cd9058fc436217b30                                 0.0s
 => => resolve docker.io/library/ubuntu:latest@sha256:2e863c44b718727c860746568e1d54afd13b2fa71b160f5cd9058fc436217b30                                 0.0s
 => CACHED [2/3] RUN apt-get update && apt-get upgrade                                                                                                 0.0s
 => [3/3] RUN apt-get install apache2 curl -y                                                                                                         24.8s
 => exporting to image                                                                                                                                 0.6s
 => => exporting layers                                                                                                                                0.6s
 => => writing image sha256:3323e865b3888a4e45852c6a8c163cb820739735716f8783a0d126b43d810f1e                                                           0.0s
 => => naming to docker.io/library/expose-healthcheck-example                                                                                          0.0s
Execute the docker container run command to start a new container. You are going to use the -p flag to redirect port 80 of the host to port 8080 of the container. Additionally, you are going to use the --name flag to specify the container name as expose-healthcheck-container, and the -d flag to run the container in detach mode
docker container run -p 8080:80 --name expose-healthcheck-container -d expose-healthcheck-exampleList the running containers with the docker container list command
docker container listIn the output, you will see that the STATUS of expose-healthcheck-container is healthy
CONTAINER ID IMAGE COMMAND CREATED STATUS PORTS NAMES
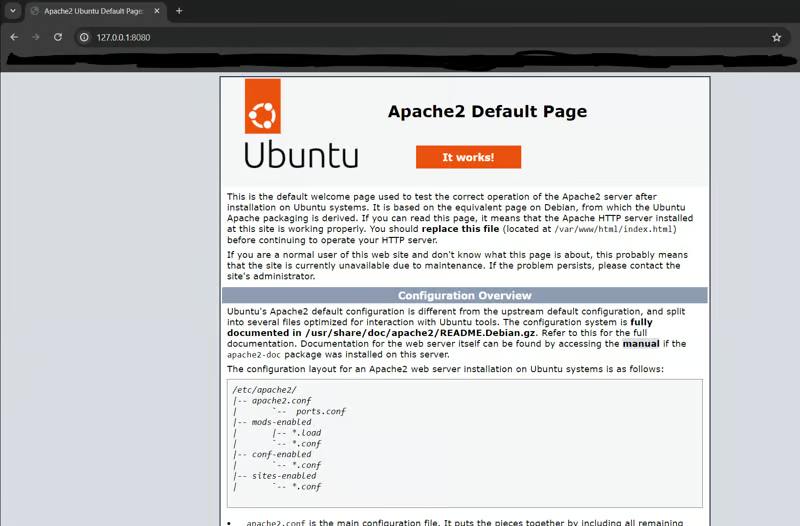
3ff16b11275c expose-healthcheck-example "apache2ctl -D FOREG…" About a minute ago Up About a minute (healthy) 80/tcp, 0.0.0.0:8080->8080/tcp expose-healthcheck-containerNow, you should be able to view the Apache home page. Navigate to the http://127.0.0.1:8080 endpoint from your browser
The ONBUILD Directive
The ONBUILD directive in Dockerfiles facilitates the creation of reusable base images intended for subsequent image builds. It allows developers to define instructions that will be triggered only when another Docker image uses the current image as its base. For instance, you could construct a Docker image containing all necessary prerequisites and configurations required to run an application.
By applying the ONBUILD directive within this "prerequisite" image, specific instructions can be deferred until the image is employed as a parent in another Dockerfile. These deferred instructions are not executed during the build process of the current Dockerfile but are instead inherited and executed when building the child image. This approach streamlines the process of setting up environments and ensures that common dependencies and configurations are consistently applied across multiple projects or applications derived from the base image.
The ONBUILD directive takes the following format
ONBUILD <instruction>As an example, imagine that we have the following ONBUILD instruction in the Dockerfile of a custom base image
ONBUILD ENTRYPOINT ["echo", "Running an ONBUILD Directive"]The Running an ONBUILD Directive value will not be printed if we create a Docker container from our custom base image, but will be printed if we use it as a base for another Docker image.
Using the ONBUILD Directive in a Dockerfile
In this example, we are going to build a parent image with an Apache web server and use the ONBUILD directive to copy HTML files.
Create a new directory named onbuild-parent-example
mkdir onbuild-parent-exampleNavigate to the newly created onbuild-parent-example directory:
cd .\onbuild-parent-example\Create a new Dockerfile and add the following content
FROM ubuntu:latest

RUN apt-get update && apt-get upgrade

RUN apt-get install apache2 -y

ONBUILD COPY *.html /var/www/html

EXPOSE 80

ENTRYPOINT ["apache2ctl", "-D", "FOREGROUND"]
This Dockerfile begins by using the latest Ubuntu base image. It updates and upgrades the system packages, then installs the Apache web server. The ONBUILD directive specifies that any child images built from this Dockerfile will automatically copy all HTML files from the build context to the /var/www/html directory within the container. Port 80 is exposed to allow incoming traffic to the Apache server. Finally, the ENTRYPOINT command configures the container to run Apache in foreground mode, ensuring it remains active and responsive as the primary process. This setup enables the container to serve web content via Apache on port 80.
Now, build the Docker image:
docker image build -t onbuild-parent-example .The output should be as follows:
[+] Building 3.5s (8/8) FINISHED                                                                         docker:default
 => [internal] load build definition from Dockerfile                                                               0.0s
 => => transferring dockerfile: 221B                                                                               0.0s
 => [internal] load .dockerignore                                                                                  0.1s
 => => transferring context: 2B                                                                                    0.0s
 => [internal] load metadata for docker.io/library/ubuntu:latest                                                   3.3s
 => [auth] library/ubuntu:pull token for registry-1.docker.io                                                      0.0s
 => [1/3] FROM docker.io/library/ubuntu:latest@sha256:2e863c44b718727c860746568e1d54afd13b2fa71b160f5cd9058fc4362  0.0s
 => => resolve docker.io/library/ubuntu:latest@sha256:2e863c44b718727c860746568e1d54afd13b2fa71b160f5cd9058fc4362  0.0s
 => CACHED [2/3] RUN apt-get update && apt-get upgrade                                                             0.0s
 => CACHED [3/3] RUN apt-get install apache2 -y                                                                    0.0s
 => exporting to image                                                                                             0.0s
 => => exporting layers                                                                                            0.0s
 => => writing image sha256:4a6360882fb65415cdd7326392de35c2336a8599c2c4b8b7a1e4d962d81df7e4                       0.0s
 => => naming to docker.io/library/onbuild-parent-example                                                          0.0s
Execute the docker container run command to start a new container from the Docker image built in the previous step:
docker container run -p 8080:80 --name onbuild-parent-container -d onbuild-parent-exampleIf you navigate to the http://127.0.0.1:8080/ endpoint you should see the default Apache home page

Remove the container so it won't interfere with the ports
docker container stop onbuild-parent-container
docker container rm onbuild-parent-container
Now, lets create another Docker image using onbuild-parent-container as the base image, to deploy a custom HTML home page. To do that let's create a new directory named onbuild-child-example
cd ..
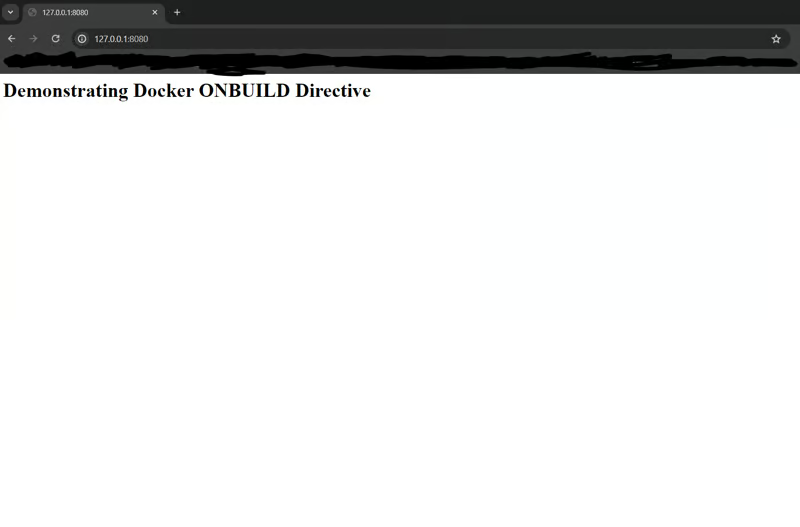
mkdir onbuild-child-exampleCreate a new html page with the following content
<html>

    <body>

        <h1>Demonstrating Docker ONBUILD Directive</h1>

    </body>

</html>
In the same directory create a Dockerfile
FROM onbuild-parent-exampleThis Dockerfile has a single directive. This will use the FROM directive to utilize the onbuild-parent-example Docker image that we created previously as the base image.
Now, build the docker image
docker image build -t onbuild-child-example .The output should be something like the following
[+] Building 0.3s (7/7) FINISHED                                                                         docker:default
 => [internal] load .dockerignore                                                                                  0.1s
 => => transferring context: 2B                                                                                    0.0s
 => [internal] load build definition from Dockerfile                                                               0.1s
 => => transferring dockerfile: 64B                                                                                0.0s
 => [internal] load metadata for docker.io/library/onbuild-parent-example:latest                                   0.0s
 => [internal] load build context                                                                                  0.1s
 => => transferring context: 134B                                                                                  0.0s
 => [1/1] FROM docker.io/library/onbuild-parent-example                                                            0.1s
 => [2/1] COPY *.html /var/www/html                                                                                0.0s
 => exporting to image                                                                                             0.1s
 => => exporting layers                                                                                            0.0s
 => => writing image sha256:9fb3629a292e2536300724db933eb59a6fb918f9d01e46a01aff18fe1ad6fe69                       0.0s
 => => naming to docker.io/library/onbuild-child-example                                                           0.0s
Execute the docker container run command to start a new container with the image we just built
docker container run -p 8080:80 --name onbuild-child-container -d onbuild-child-exampleYou should be able now to view our custom index.html page if you navigate to the http://127.0.0.1:8080/ endpoint.
Summary
In this post we focused on building Docker images. We we discussed more advanced Dockerfile directives, including the ENV, ARG, WORKDIR, COPY, ADD, USER, VOLUME, EXPOSE, HEALTHCHECK, and ONBUILD directives.
Source: Kostas Kalafatis